Monday, January 28, 2013

Project (Failed) Runway Wannabe

Yesterday (Sunday) afternoon when I take my usual siesta, I caught up on the first episode of the new season of Project Runway instead. This season it is teams, which is an interesting twist.  Although I do not care at all for the “drama” or some of the lifestyles of some of the contestants, I usually fast forward through any drama just to see the Tim Gunn critiques and the end fashion show.


After watching the episode I was instantly inspired to take some fabric I had been stashing and make a cute maxi dress out of it. I have been on the blog down low lately because I have been getting iron infusions due to this little noodle I am carrying has decided to take all of mine. Its ok though….all of it’s future Halloween, Christmas and Valentine's candy for the next X amount of years is mine…..

So I was inspired to take a simple pattern of one of little Miss O (yeah size 2T) dresses and use its as a base along with one of my shirts as a guide. Well first of all, I had way too much fabric I was working with. I am not a runway model skinny chick but I really didn't need all 4 yards that I had. Way Way too much. That coupled with I have no experience at all at what I am doing,  I also have no real “cutting” area other than my floor, which isn’t the most helpful place. I keep telling myself it isn’t my techniques that are so terrible (which is probably the actual problem) but that it is the AREA I have to work with that is the problem. Also the fact that I wanted to just “whip something up” with little thought and time consumption, I don’t know why I didn’t think I had a disaster in progress. I mean I could see myself walking into church Sunday night with ohhs and ahhs of my cute little dress only to say…”oh this thing? I just whipped it up right before church”….HA. maybe one day.

No there are no pictures. The "event" lasted a little over an hour.  I would apologize, but after I barely got it over my head, it was so ill fitting that my sweet husband started laughing hysterically. At that point I didn’t know whether to laugh or cry or be mad. Did it really matter that I took no measurements, use a real pattern or have any instruction? Do all of your seems have to line up? Do I really need a neckline? Do I really need a waistline? I thought it didn’t, but apparently I haven’t quite got to that level yet. I mean I thought all I needed was some elastic and a good belt to hold it all in. Not so much. Patterns seem to be my friend. Plus with adult clothing, there is just so much more fabric to deal with. Kids clothes are getting easier, as my kids are small and I don’t have fabric falling into my lap and floor as I try to sew.

Anyway…after all of those excuses(and I have more if those aren’t enough)  I have learned the following:

1) I am a project runway wannabe…meaning I can complete a garment in record time….just don’t expect anyone of any fashion style to be able to wear it.
2) I am completely and utterly impatient, which is not a plus when some things in sewing take many steps. They take those steps for a reason and I just need to grit my teeth and do it the “right” way as opposed to what I think is the quick and easy way. I haven’t even mastered the right way, so I don’t know why I think I can branch off and do my own thing.
3) Sewing is so therapeutic to me. Even with the dud I created, I am actually excited that I got to get a little sewing done and learned some things.
4) Even though I won’t be wearing the “gorgeous ill fitting” Chrissy Couture dress, I am already envisioning what I can make with it, which I believe will be a maxi skirt...(perfect for the spring/summer ahead of us). And this time I will take the time needed to do it the right way.

For more tips on how to be a better seamstress, just follow me….you will learn that you are probably WAY better of that you thought! Haha.

That’s all for now….I will photograph the  "ill fitting" when I deconstruct it to a skirt and try and share that with you all....

Until then....

Keep Calm…..and Make it Work.

Tuesday, January 15, 2013

Sew....No Sew Socks


So not only do I love to create, re-fashion, and (humbly) copy things I see online, I love to thrift. This is no secret. I live on a pretty tight budget and rarely do I spend money on something retail. I will goodwill or thrift shop and if I see something that the kids can wear now, or in the future, I will pick it up. Especially if at the Goodwill Outlet where you pay very little for your items.

I picked up some red and white striped knit tights for Miss O and knew that they would probably only fit this winter, but at the cost, I couldn’t pass them up.


Well the first time she wore them she came home from daycare with a little hole in them.

Crackers.


Now I am going to have to pitch them in the trash. Or do I? What if I just snipped the bottom of them and made some cute socks? I mean the divorce rate among my children’s socks is quite frightening. I am well aware that I probably am not the first person to come up with this, but when I think of something on my own, (without pinterest, or fabulous blogs I follow) I get excited. J

Have a pair of tights that are getting too small for your littles? Why not just make them some extra cute socks? Its really so easy!

First off, because they are knit, they will likely not fray and you may not even need to sew them. I wanted and excuse to sew, so I sewed mine.

First take your tights and just line them up, heel to heel.


Decide how long or short you want them. And cut them both straight across.


Technically you could be done. What’s not to love about new socks. If you want to fold down and hem them, its quite easy as well.

I turned mine inside out, folded over a half inch or so, and zig zag stitched around.


Then flipped back and Wah-lah. If they are a little big, you can always shirr with a little elastic thread, but I found that mine held up just fine. I think if you use a pair that is getting small it will work best.


And there are the tootsies being modeled. I needed a cute little outfit to go with them and remembered this darling little sweater I picked up at the outlet months ago. 


One little IU (Go Hoosiers) bow to match and we are ready to go!


Hope I have inspired to you to make some socks. I mean if you are just going to pitch them or donate them, you might as well just make some cute socks. If you don’t sew, you can still do this one!

What do you think? Cute?

Until next time….

Keep Calm…..and keep on a TIGHT budget…

Thursday, January 10, 2013

Baby Bibs Galore....and Oh Snaps!

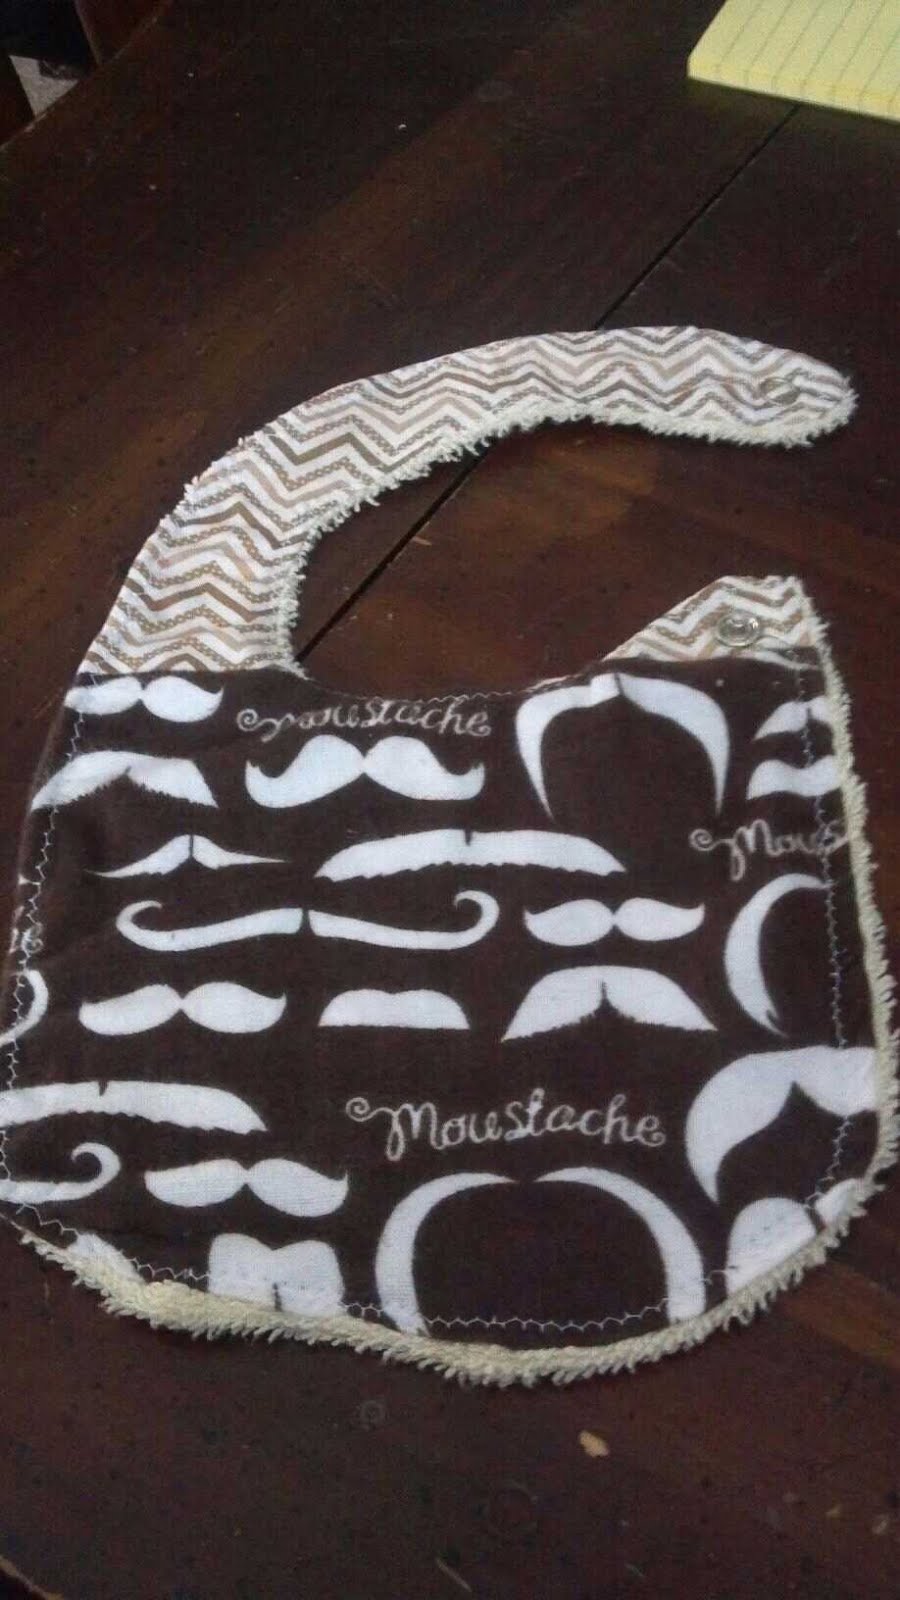
So I have a sweet friend who let me take Maternity Pics of her a few months ago when the weather was beautiful. Well since then she delivered a beautiful bouncing baby boy. I didn't get permission to post any pictures of him, so unfortunately you have to just imagine, but he is a little doll. So she really underestimated the number of bibs she would need for Mr. C. and she wanted some cute ones with mustaches on them and other little things. I embarked on a journey to do some for her and managed to get 1 and 3/4 done before my needle broke. Curses! I journeyed to walmart the next day and got another set of needles and have about a dozen left to do.

SIDENOTE: This blog has been ready for days...but Blogger for some reason decided to not let me upload photos.... I used a work around....Chrissy Couture must go on! :) lol
Here is a super easy tutorial in making bibs.

First off, get some fabric you love. A cotton will probably work best. For the back side, you can use a towel, a burp cloth or some other semi-absorbent material. If you use cotton on both sides, you will end up with a very thin bib.

She bought the fabric she liked and provided the towels.

She had already cut around one of his bibs as a pattern to go off of, so I used it to cut the rest of my fabric.


Once the pieces were cut, I pinned them right sides together, (which with a towel, either side is right side) and then I straight stitched around the outside making sure to catch both the towel and the fabric.


At the bottom, I left and opening and did not sew it so I could then turn it right side out.


The tricky part to turning the neck part right side out is to use a pencil and push the fabric through. My fingers would not work. At first I thought the pencil would rip the stitches I just put in as I pushed, then I remembered how long it took to unpick the last thing I sewed wrong. Never fear, those stitches are in there tight.


Then once you have it all turned, fold the bottom that you didn't sew into itself and pin.

Top stitch the whole thing around with a straight or zig-zag stitch. I used the zig zag cause I thought it looked cute.


Then to attach snaps. I had never used snaps before and I had read many blogs in the past that said they can be the devil if you don't have the right tool. Well all I can say to that is I agree! :) My sweet friend bought a little tool and the snaps and I tediously read (ok.... half read) the instructions. The 4th or 5th time I tried attaching a snap, I finally got it. Between the plastic piece and a hammer, hopefully those snaps are there to stay.


And here it is finished. It just needs a good ironing and then its complete.


I started this one too, but like I said my needle broke before I could flip in the bottom and top stitch.


I will be finishing them hopefully this week. And maybe next as well.

Try it out, its really easy.

And what do you think? I "mustache" if you like them.....

Until Next time....

Keep Calm......and Oh Snaps!

Wednesday, January 2, 2013

Holiday Recap....

Testing……testing……anyone out there? No, I didn’t fall off the planet. Sorry for the lack of blog lately. I promise I have some good excuses. J

1.       This pregnancy has just zapped all of my energy.  Now that I am slowly moving into my second trimester in a week or so, Hopefully the energy will pick back up. Oh and all the nausea and sickness didn’t help.

2.       Holidays, holidays, holidays

3.       Snow and Snow and Snow.... (which really isn’t an excuse, but……)


So since I have a few tutorials waiting to finish and blog about, and the fact I haven’t posted in like 2 weeks, I thought I would just give you a photo blog of our lives the past few weeks.


Christmas Dinners


Get that Pumpkin Pie! (His Favorite)

Sissy liked it too,....but mainly the Cool Whip. :)


Christmas Morning! Merry Christmas!

Sleepy Christmas Morning!


Our First Snow this year. We didn’t get any last year and Noah was so excited to finally get to play in it this year. Little Miss O wasn’t sure what she thought of all of it.


He especially liked the eating part. Who didn’t love to eat snow as a kid?


Hope everyone had a fabulous holiday time. I am back to work today and itching to get some sewing done. Oh by the way, got a new Sewing Machine for Christmas! So excited, but yet intimidated to learn this fancy new Singer Machine.

Until next time......

Keep Calm……and Carry On…. J


Monday, December 17, 2012

Beautiful Sunday to Model....

So remember the Pinafore dress that I made a few weeks ago? And how the little model was asleep so I couldn't try it on her, let alone snap some pictures of her? Well that finally happened yesterday.

And the weather was beautiful out (way to warm for December) so I snapped a few with my phone before heading to church.

I know, I know....I got a nice new fancy Canon Rebel for Christmas and it sits in the bag and cell phone pictures get the most use. I do love that camera, but it seems like a lot of work when we are just trying to leave the house. I digress.....

Anyway here is how it turned out.....


She wasn't really in the modeling mood. But she did a good job.


I kept telling her to turn around so we could see the back side, but this is as good as that got.

Then she started laughing....so then I started laughing....

Finally I said...Sissy, but your hand up on your face like this....and this was what I got. :)

Sorry for the adorableness....(and I am partial, but aren't most parents?)

And then my sweet boy pulled this shirt out of his closet. He came out and didn't say anything but just walked around for me to notice. It was his daddy's shirt when his daddy was his age! Fit him perfect, and there is a resemblance...no?

And yes that is Duck Dynasty on the TV in the background. I just became a fan this year and its pretty hilarious. I couldn't figure out what the hype was all about until I watched a few. Now I am hooked.

This was our weekend. Things have been crazy busy getting ready for Christmas.
Hopefully I am nearing the end of morning sickness and I haven't even wanted to sew because I am so sick and tired. This too shall pass right?

Until Next time....

Keep Calm and be Happy Happy Happy....

Thursday, December 6, 2012

Regarding X-Mas Treasure

So this is not a craft post today. This is not even a random food post, or just something cute my kids did. This is a revelation post.

Let me explain....

On Sunday, I was driving home from church and I saw a sign along some houses that declared

"This year, let's keep CHRIST in Christmas!".

I read it and thought about how many people I know just despise the use of X-MAS. I personally do not use it when I talk about Christmas, but I am not condemning anyone for it. I wondered where it began and who started it. Why do we know that X-MAS "means" Christmas but we all throw such a fit about it. So I looked it up.

Many people think that X-MAS was a way to "X out" Christ from Christmas when even though that has seemed to happen on its own, its been around long before Christmas traditions even started.

Christ in the Greek is roughly translated to Xpistos. On many occasions through writings and letters, when speaking of Christ, it would be Abbreviated to X or Xp. Throughout the years this has just continued on and in regards to CHRISTmas, when people are in a hurry or don't have the room they abbreviate the word Christ for his abbreviation of X. (X-MAS)

Now, I know you must be thinking, why in the world is she giving us this history lesson? Is she trying to convince us its ok to use X-MAS?

No, actually I have no desire to convince you one way or the other which way you decorate your home or office. What I am going to tell you is what happened next.

So as I was driving in the car, (at this point still unaware of the history behind the X-MAS) I began to think about the letter X. Perhaps they meant for it to be a cross, but couldn't say t-mas. Perhaps they used X because they really wanted to "Cross out" Christ. Then it hit me. I mean when the next thought came into my head I almost had to pull over.

What do you look for every time you pull out a treasure map? You are looking for the treasure right? What marks the treasure? Doesn't X always mark the spot? For those of you that know where I am going, yay, for those who are like....yeah I don't get it, stay with me....

For many people in the world today, they use X-MAS. Not because they hate God, or want him out of the picture, but their whole life, they have been taught to search for X. X marks the spot, X is where the treasure is. If us Christians would stop judging so much and starting loving people, we can help them realize that X is really Christ, then once they find him, they will have more treasure than this world can ever give. I used to search for X, and then I met who X is and is completely changed my life forever.

I guess the saying really is true......X (CHRIST) really does mark the spot.

I hope you enjoyed my little revelation. Feel free to share and comments are always welcome.

Until Next time...

Keep Calm......and find the treasure...He is waiting on you....

Tuesday, December 4, 2012

Sweet Sweet Vintage Pinafore.....

So last week I said I would get the pinafore dress up that I had made. Did anyone see that get posted? Raise your hand if you are terribly disappointed....(one, two.....too many to count) By the way, I am raising my hand too. So as promised from last week, here is the finished sweet Pinafore dress.


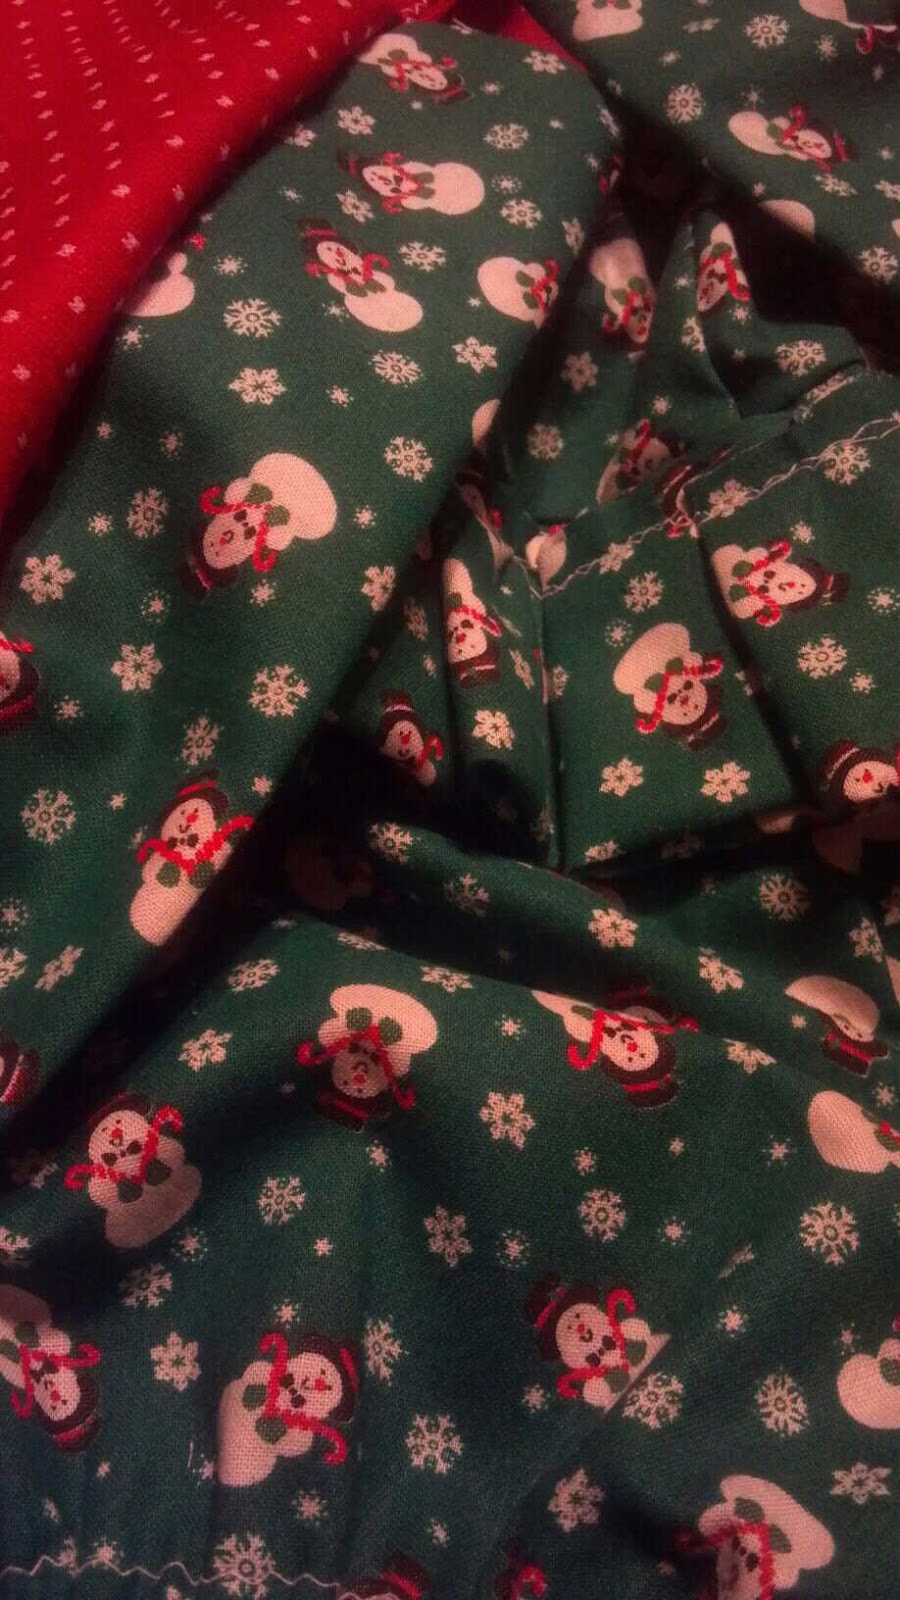
The bloomers are two sided. Vintage Red and white for the front, and ruffly snowmen for the bum. Now some would think I was just being fancy making it two sided. Should I tell you I ran out of fabric and had to piece together what was left to make it? Nah, I will keep it a secret.


I love the vintage sewing pattern I have. I love how it criss-crosses in the back leaving an open space for a ruffled up bum! I got the old vintage pattern while thrifting.  I went for it and the whole thing is lined. So no worries of seeing the ugly side of fabric. The fabric consisted of some vintage red and white polka dot polyester like material and then some cotton scraps of this cutsie snowman print. 

Here is part of the ruffles on the sweet little bloomers.... 

And lets not forget the cute Grinch color vintage buttons. (love me some Mr. Grinch)
For not really using a "button holer" attachment or anything fancy, I am quite proud of the amount of buttons I put on things. :)


And a little Instagram fun of the whole project together.


So there you have it as promised. My little princess is in a 2/3 but this was a size 4 and fit her perfectly. When I get her in it and snap some pics, I will be sure to post. (I know a good blogger would have already done this, but just be patient with me here...lol)

Until next time....

Keep Calm ......and watch The Grinch. :)