Tuesday, May 14, 2013

A Year Already?? First Year at Sewing/Blogging.


Can you believe it has been a year to date that I started this little blog? I remember my very first post. It was short and sweet and didn't really say much. I have always been more likely to lean towards the creative nature of things than engineer, so when I took the leap, I have never looked back. Some posts have been more personal, others have just been the hilarious mis-hap that happened, or the finished product of some door wreaths or little clothes. Was it necessary? Well, probably not. Do I enjoy it though? Absewlutely! I know I have many friends that read my blog, but it thrills me when I see that 27 people in Spain viewed my blog on a certain day or week. Or 87 people from a combination of countries have visited my page in a week. It just makes my heart smile. You, reading this now, if it wasn't for you, I would probably not be motivated to try and get a post in at least once a week. (I know some weeks this is difficult for me!)

When I was posting last weeks post about the Vintage and Lace Ruffle Set, I saw a progression of where my sewing began to where it is now. It isn't a big secret that after my daughter was born, I severely went through post partum depression. I felt as though my life was just passing by and I had no creative outlet to express myself. My love and passion of photography was always put on hold from fear of not being good enough, or "doing what everyone else seems to be doing". I also wanted to learn how to sew. I took a class in high school years ago, and was horrible at it, but I wanted to try again. My mother brought me her sewing machine that she used for many years for me to just play with and see if I would really enjoy it. Firstly, it sat for almost a year before I even touched it. I was too afraid I wouldn't know what I was doing or that if I did figure it out, I wouldn't really be able to make anything cute. One night after I got home from work I was determined. I don't know what had changed in my head but I went home, put it on the kitchen table and decided I was going to start sewing. After 2 hours of trying to figure out how to thread the silly thing, numerous YouTube videos and a couple of calls to momma, I finally got it threaded. I think that night I sewed a few straight lines on some scrap material and then went to bed. The rest is history. My sweet husband went within the next week or so and got me a "sewing table" and set it all up while I was at work. I got a sweet text from him saying he believed and supported me. I never knew something so simple could mean so much to me. Even now when the kids are running wild and I am at my machine trying to punch out another beautiful creation, he will wrangle the children so I can have a little sewing therapy.

So through all of this rambling, I want you to know that I am glad you have followed along. If you are stumbling across this post for the first time, I hope you stick around. Things can and will only continue to get better from here. Here is a look at the last year very quickly.


Lets not forget our first attempt at sewing a dress..oh my how ill fitting!

Yes even the model was not a happy camper, and I do not blame her!

A Happier face, but can anyone see how the "collar" is just hanging on her shoulders barely?

Disney outfits. I can only take credit for adding some ruffles to a shirt and applique of Minnie.

This is that wonderful fabric already shirred. I just sewed up one side and it was done!
  

One of my favorites of the wreaths I made last year.


Chrissy Couture Cardigan - Featured on Sugar Bee Crafts! Now that was an exciting day!


Horrible picture quality. 10 minute Maxi Dress that only took me 2 hours!


Newspaper pattern and outfit made with my Mom while she was in town.

Hair Plopping. Still the most viewed post on my blog. Has had more hits that the Beatles....ok, not really but you get the point.

SpiderMan Cape. (even though he doesn't really wear one)

 
No Sew Wreath and Paper Flowers
 
Still Life Photography for the fair. Swooon.

First Attempt at sleeves and following a pattern.


Same pattern as above with some pattern mixing and belt.

Pattern mixing with a big BOW

Super fun Maternity Shoot with a gorgeous Momma.


Sock Monkey Tag Blanket
  
Ruffle Dress from a Woman's Shirt.


Bow Scarf

Vintage Pinafore Pattern

Un-Expecting another blessing....a Girl due in just 60 days!

Spikey Bows


First successful Ruffle Pants and Top.


What a Journey! And I left out quite a few posts still! I just love looking back and loving each new thing I sew more and more. Every new dress for Livy, or Every new little shirt or toy for Noah just makes me happy I can make it for them. Just last night Noah needed a "Ninja Belt" for his sword. With a strip of felt, elastic and a few zips down the machine and he was elated to have a new "ninja belt" that would hold his sword.

I hope you have enjoyed this journey and will stick around. I always LOVE hearing from you. Your thoughts, ideas, suggestions.

Until next time....

Keep Calm....and Keep Moving Forward.

Monday, May 6, 2013

Tips on Planning a Disney Vacation....

A while back, (especially when we returned from our second Disney trip in a year), multiple friends began asking my opinion on what we did, how we planned, what was easy, what was difficult and so on. I decided it would be a great blog post.

We begin Part 1 of "Disney World Vacation Series"


Apr 2012

Feb 2013
  For the record, these opinions are my own and are not being sponsored by Disney, HOWEVER if they find this series post and choose to reimburse me with a free vacation back there, I would gladly accept.

Don't forget this will be a 2 part series.

Series 1 – Tips on Planning a Disney Vacation

Series 2 – Tips for Enjoying your Disney Vacation


Lets get started!


How to plan your trip based on what you want to get out of it.

1.       Be reasonable with your time and decide what you want your trip to be. If you want the “Disney Experience”, stay on Disney. I could go on and on about this. Everyone thinks its so much cheaper to say off of Disney and I don’t agree. Its actually very close in price unless you are staying at a 1-2 star inn that may or may not have contracted bed bugs. Just saying, you do get what you pay for now a days. This doesn’t mean you can’t find a great deal, but if you consider all the extra gas you will use (if driving) and the extra time it takes to get from the parking lots to the actual park, (not to mention the headache) it adds up.

You can still drive your own car, but part of the convenience is Disney will take you everywhere you want to go, (within Disney property of course!) We just park our car and it doesn't move the rest of the week.

There are a Huge Selection of Resorts to choose from, all based around fun themes and prices. The Resorts are broke up into 3 categories. Value, Moderate, and Expensive, (I mean Deluxe).

We have stayed at both the Value and Moderate Resorts. We stayed at the Moderate Resorts before we had children and have stayed in the Value resorts since. There isn’t much of a difference at all other than price in my opinion. The Value resorts rooms are just as clean, and “spacious” as the Moderate resorts. It’s all a matter of what type of vacation you are planning. We love the Port Orleans Moderate Resort. It is just beautiful, but we had no kids at the time and it wasn’t loaded down with children. The Value Resorts on the other hand I think appear to be geared towards families. I mean we stayed in the “TOY STORY” section at All Stars Movie Resort. We were practically the size of a toy in Andy’s room. The kids loved it, and well we loved that they loved it. Also, Disney Transportation is SO much better than driving to a park, walking or riding a tram to the monorail, riding the monorail to the park…etc. And if you have strollers you have to fold up every time, it’s just difficult. Disney Transportation drops you off right near the entrance, so for our family it was a win-win!

I will say that if you are planning not a whole Disney vacation, but that you want to add a one day of Disney in, then yes it would be logical and probably cost effective to stay off of Disney. I think that if we were only going to do Disney for a day and then hit Universal, and Sea World and Holy Land Experience and….(you name it) then we would probably stay off of Disney property in a center location around these attractions. I don’t think you can really do “Disney” in one day, so we don’t usually attempt any other parks while we are there. We go for the “GOLD” and do it Disney all the way. Its just a choice you have to make. Also, with the ages of our children, Universal was out. We did go off Disney for the Holy Land Experience and the Beach in the past. Its not difficult to get out of Disney, but they do make it to where you really have no need to leave at all. Good work on their part.

2.       Order a Free Disney Travel Planning DVD. I mean it is completely free. It will give you a ton more information that I am giving you and it’s a little movie. Who doesn’t love that. It gives a brief explanation of the parks, resorts, cruise line, etc. And again, its free! Just sign up and it will arrive in a few weeks. (we still get one every time! Hey you don’t know if they have changed something in the last year…lol)

3. Visit Disney Moms Panel. It has 100s of different questions that are answered by the "official Disney moms" that have answered many of my own questions in the past. You can even ask a question as well. Again, totally free.

4. You can use a travel agent or book directly through Disney. It should NOT cost more to book through an agent though. They are getting a kickback from Disney to book it, and you should not have to pay them at all. We just book it ourselves. I like that Disney's Vacation planner is user friendly and easy to use. You can save up to 3 different vacations so you can compare prices.

5. Consider the dining plan. I mean really consider the dining plan. If you are going full force and staying on Disney, I feel like it is the ONLY way to go. Especially if you are wanting to do character meals. (More on this in part 2) There are a few choices of dining plans. We generally choose the middle plan which is reasonably priced and gives you one snack, one quick service meal, and one sit down meal per day. The next up package was alot more than what we needed and the lower package just didn't seem like it was enough. We were on a budget so it helped to add our food into our "total". Then when we got ready for our trip, all we needed was the "extra" spending money for souvenirs or just extra money.

6. Tickets, tickets, tickets. Park tickets aren't cheap. They will cost you roughly 100$ a person, per day. You can include these in your "package" and I don't think you get much if any of a price break. You have 2 options. Park Hopper tickets, - that let you hop from park to park with ease and no trouble, or you have single day tickets, which are cheaper that allow you into one park only. My suggestion is think about who you are traveling with. If its young kids and you have strollers, opt out of the park hopper tickets. You will save some money. I know especially in our case, it takes so much time and energy toting kids to one park, I can't imagine trying to "hop parks" the middle of the day. If you have older kids, then keep the park hopper and make it worth every penny. For us, we knew that saving the money and visiting one park each day was PLENTY. You definitely will not get board and most of the time, you will find that one day is hardly enough.  We usually figure out how many days we are going to be at Disney and then purchase or add to our package that amount of tickets. You can still choose which parks you want to go to on which day, but once you use a ticket for Magic Kingdom, its only good at MK that day. Do you save hundreds on not getting the park hopper? no. But is it enough that if you know you aren't going to want to hop around to just do without it? yes.

Once you figure out what you want, you can begin planning your trip. I hope I have began to get some of your questions answered with a real opinion of a mom of 2 (soon to be 3) kids. Who doesn't want to save some money while taking their children to the most magical place on earth?

Until Part two.....

Keep Calm......and start planning!

Friday, May 3, 2013

Vintage and Lace Ruffle Set

I purchased some burnt like orange vintage fabric months ago. Actually close to a year ago. It was right after I began to sew. I had no idea at the time about textiles and different fabrics, I just knew it screamed vintage and I loved it. Since I have been having the best luck with quiting cottons, it just kind of sat, unloved, unappreciated.


As I have grown a little more confident in my sewing skills, (although ways to go still) I pulled it out with a plan. I could add some ruffles of lace that I picked up months ago as well and do a cute spring ruffle set. Remember when I did my first set of ruffle pants here?

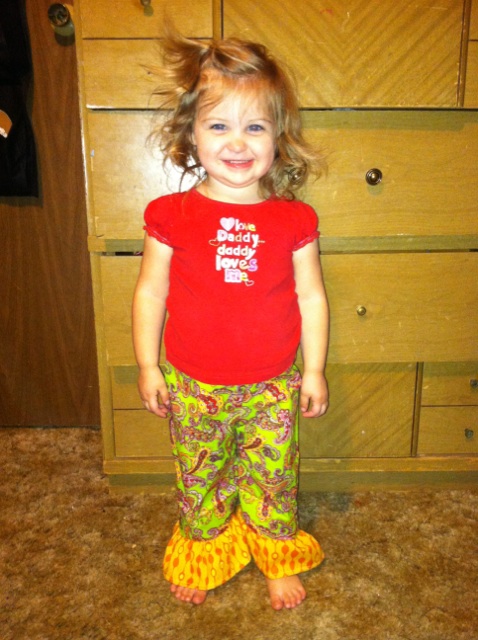
Girl getting her Model on..... 


Lets just tie some extra scrap pieces in our hair shall we?


The print is gorgeous and the textile has some stretch to it. Some sort of polyester I am sure. I made the pants first and then I was planning on a 3/4 sleeve top. Well the sleeves ended up being long which still worked, (since the weather here STILL hasn't decided if it wants to be warm or cold) but that's also what happens when you guess at measurements and don't really use a pattern. I still absewlutely love the way it turned out. My proudest piece so far. And if you have been around for any amount of time, you have seen some of my first sewing projects.....and can really appreciate this one.

Like here, first dress ever constructed using an old skirt of mine and guessing at a shape. It may not look horrible in the picture, but trust me it was the most ill fitting garment! I barely got it over her head let alone her little chubby rolls! (SQUEEZE) First lesson in seam allowances......


Or here, Even Livy was like...MOM I HATE IT, (well she had allergies bad)! This is supposed to be Prudent Baby's Snappy Toddler top. They would probably cringe if they saw it. It was my second attempt ever to make Miss O something. Second Lesson at seam allowances.  I do plan on making another one this summer so you will probably see this image again compared to hopefully something fabulous! 

As I pulled these pics out, I saw a whole progression of how my sewing has evolved in the last year. May marks 1 year of blogging and sewing so I will probably do something fun for making it this far!

Back to the reason why I posted all of that, so you could appreciate this below~


 Adding lace as ruffles might be my new favorite, so be on the lookout. Firstly, no hemming! Hallelujah! Second, it ruffles so easy and nicely!

I added the detail to the top after I showed a few friends and family. Momma said it needed something at the neckline. Who am I to argue with momma #1, and #2 I am all about adding more lace! So it is just a removable pin that can be added to a headband next time or whatever I choose.

I will be the designer on project runway that Tim will say, Now Chrissy, you need to step back and really take an editing eye to this, don't over design! (and I seriously hear Tim Gunn's voice when I read that sentence)
More Scraps tied to piggy tails...

So what do you think? Do you love it as much a me?


I really hope you enjoy following along, I get really excited about comments too!

Until next time....

Keep Calm and Ruffle up some lace.....

Tuesday, April 30, 2013

40 Custom Clothing Labels for $6!

So I was browsing tutorials a week or so ago and came across See Kate Sew's post about 300 custom clothing labels for $20! I was instantly excited. I am not selling any of my Chrissy Couture clothing...(yet) but I still thought it would be fun to put a cute label on them. If you have ever checked the price of labels though....EEEK! They can be expensive! And since I just want to cutesy up a ruffle pant or top with my little generic logo, I didn't want to invest $50-$100 at this point in time.

Excuse my ADHD....let's get back on track.  That is why I was so excited to come across Kate's tutorial.

All I did was visit Spoonflower.com. It is a website that lets you upload your own graphics, pictures, whatever and you can create your own fabric. First off, that is super cool. I mean when you see the designers on Project Runway get to design their own textile you think, "wow I bet that is expensive", but Spoonflower is really reasonable! No minimum order either!

Kate gives you a full tutorial, so I won't try and duplicate her effort in details like she did. Check it out if you want the ins and outs. All you do is repeat your image on the fabric and wa-lah. You can order a fabric swatch, which mine was $6 shipped and I ended up with 40 Chrissy Couture labels. My only suggestion is to make sure you account for spacing. I have an oval around my "logo" but when I fold the fabric into my labels, I will probably lose part of the oval from folding. Just make sure you take that "space" into account when ordering. (or just dont put a border on it and you will be fine!)


So what do you think? I never knew a $5 fabric swatch could make a girl so giddy. I just began this blog and this sewing adventure a year ago after really struggling with post-partum depression. It has been such a great "therapy" to me to sew something and be proud of it and hope others love it as much as I do. I am still learning as I go, but its the little things like this that just make me smile.

Now I can add some cute labels so that when millions flock to me wanting my garments (dreaming a little), they can have a proper label! ha.:)

Until next time....

Keep calm.....and Make some textiles or labels! xoxo

Thursday, April 25, 2013

Spiderman Muscle Tee

So I have not been completely MIA, (isn’t this how most of my blogs begin?) haha

I have been busy enjoying the random days of spring weather with the kids, trying to get things organized around the house and have done a few little sewing projects that I am super excited about.

For months, and I mean months when I would start sewing a little dress or outfit for Miss O, Noah would ask, “Are you going to make me a Spiderman shirt?”. To which I would respond with, “yes sweetie, I just need to figure out how to do that”. I bought some Spiderman fabric that was a remnant from Hobby Lobby months ago and even used a little bit of it here when I made him his Spiderman Halloween bucket. I was feeling brave and thought “what’s the worst thing that could happen? “ and pulled it out to make Noah a shirt.


I don’t have a full tutorial because I was just trying to figure it out as I went, BUT It was really easy though. Let me try and explain.

All I did was fold a pajama shirt in half long ways on the fold of fabric. Then trying to allow for some seam allowance, I cut 2 pieces. The front and back. Then I just kind of eyeballed a neck line and cut both the front and back together. The shoulders were long enough that it made it like a muscle shirt. I really had no intentions of him wearing it out of the house when I made it, so I was ok with the no sleeves. I figured it would be a pajama shirt or play shirt outside. Little did I know he begged to wear it to his gymnastics class. Then once I sewed the seams and hemmed the bottom, neckline and sleeve area it was done. Oh I had to add a few inch panels to each side. When I held it up before I sewed it I did a quick hold up fitting and was worried it would be too small. I am so glad I went ahead and added those panels.


Little boy was thrilled to try it on! He even “helped” me sew it by pushing the petal while I guided the fabric.

Livy just had to have some photo time too. Its funny how are kids seem ready when the camera comes out to show their personalities.


And what is Spiderman without his web hands going crazy?


My mom and “sewing mentor” who lives hundreds of miles away thought I had bought it when she saw a picture. That made me feel good! Oh no, this is a Chrissy Couture Original. It turned out really cute. I mean really superhero like.

What do you think?

Oh and now my Spiderman as learned a new trick as well. 


Until next time,

Keep Calm.....and just go with it!


Monday, April 8, 2013

Boutique Outfit with Ruffle Pants

My new sewing machine (insert her new name, which I haven't decided on yet), and I have been getting along a little better. At first she would not zig zag stitch at all, and I think I have realized she is slightly hormonal and temperamental like her owner. I speak her language so I just pet her nicely and try something else and we are working out our differences slowly.

I had some time after finishing some cutesie bibs for my friend's baby to tackle the coveted "boutique outfit with ruffle pants". I have wanted to make this since I first began sewing. Little did I know at the time it would take ME a year to learn the basics, and get up the courage to just do it. Girls let me tell you, it is not hard at all! My fear of it was worse than the actual project.


I bought the fabric for this outfit almost a year ago. It was one of my first fabric purchases. I bought 2 yards. It was on sale and I had no clue how much fabric 2 yards was at the time, (when I had a 1 year old) but I am glad I had held on to it, because I had plenty to do this project with.


 The pants. The coveted wonderful ruffle pants. There are many tutorials out there, with different ways to do them. I watched a few you tube videos and read about 10 tutorials. This one here is the way I did mine. I didn't use the pattern she attached however, I just used a pair of pants that Olivia could already wear that were a little loose. I tried using a pair that fit her good only to find they ended up being too small. I figured if I cut them a little big I could always adjust the waist with elastic.

I knew I could make a top/dress/tunic at this point without a pattern if I stuck to the "peasant" type elastic top. These are so easy to make and you don't have to mess with buttons/zippers or anything. You just slide over the head and voila!


I was so excited it turned out!


One day when I have more time (haha) I will have better more "professional" pictures of the things I make. For now, heading to the car on the way to church is just what we have.

Seriously give these a try. They aren't as hard as they look.

Until next time,

Keep Calm and Get your Boutique look on....